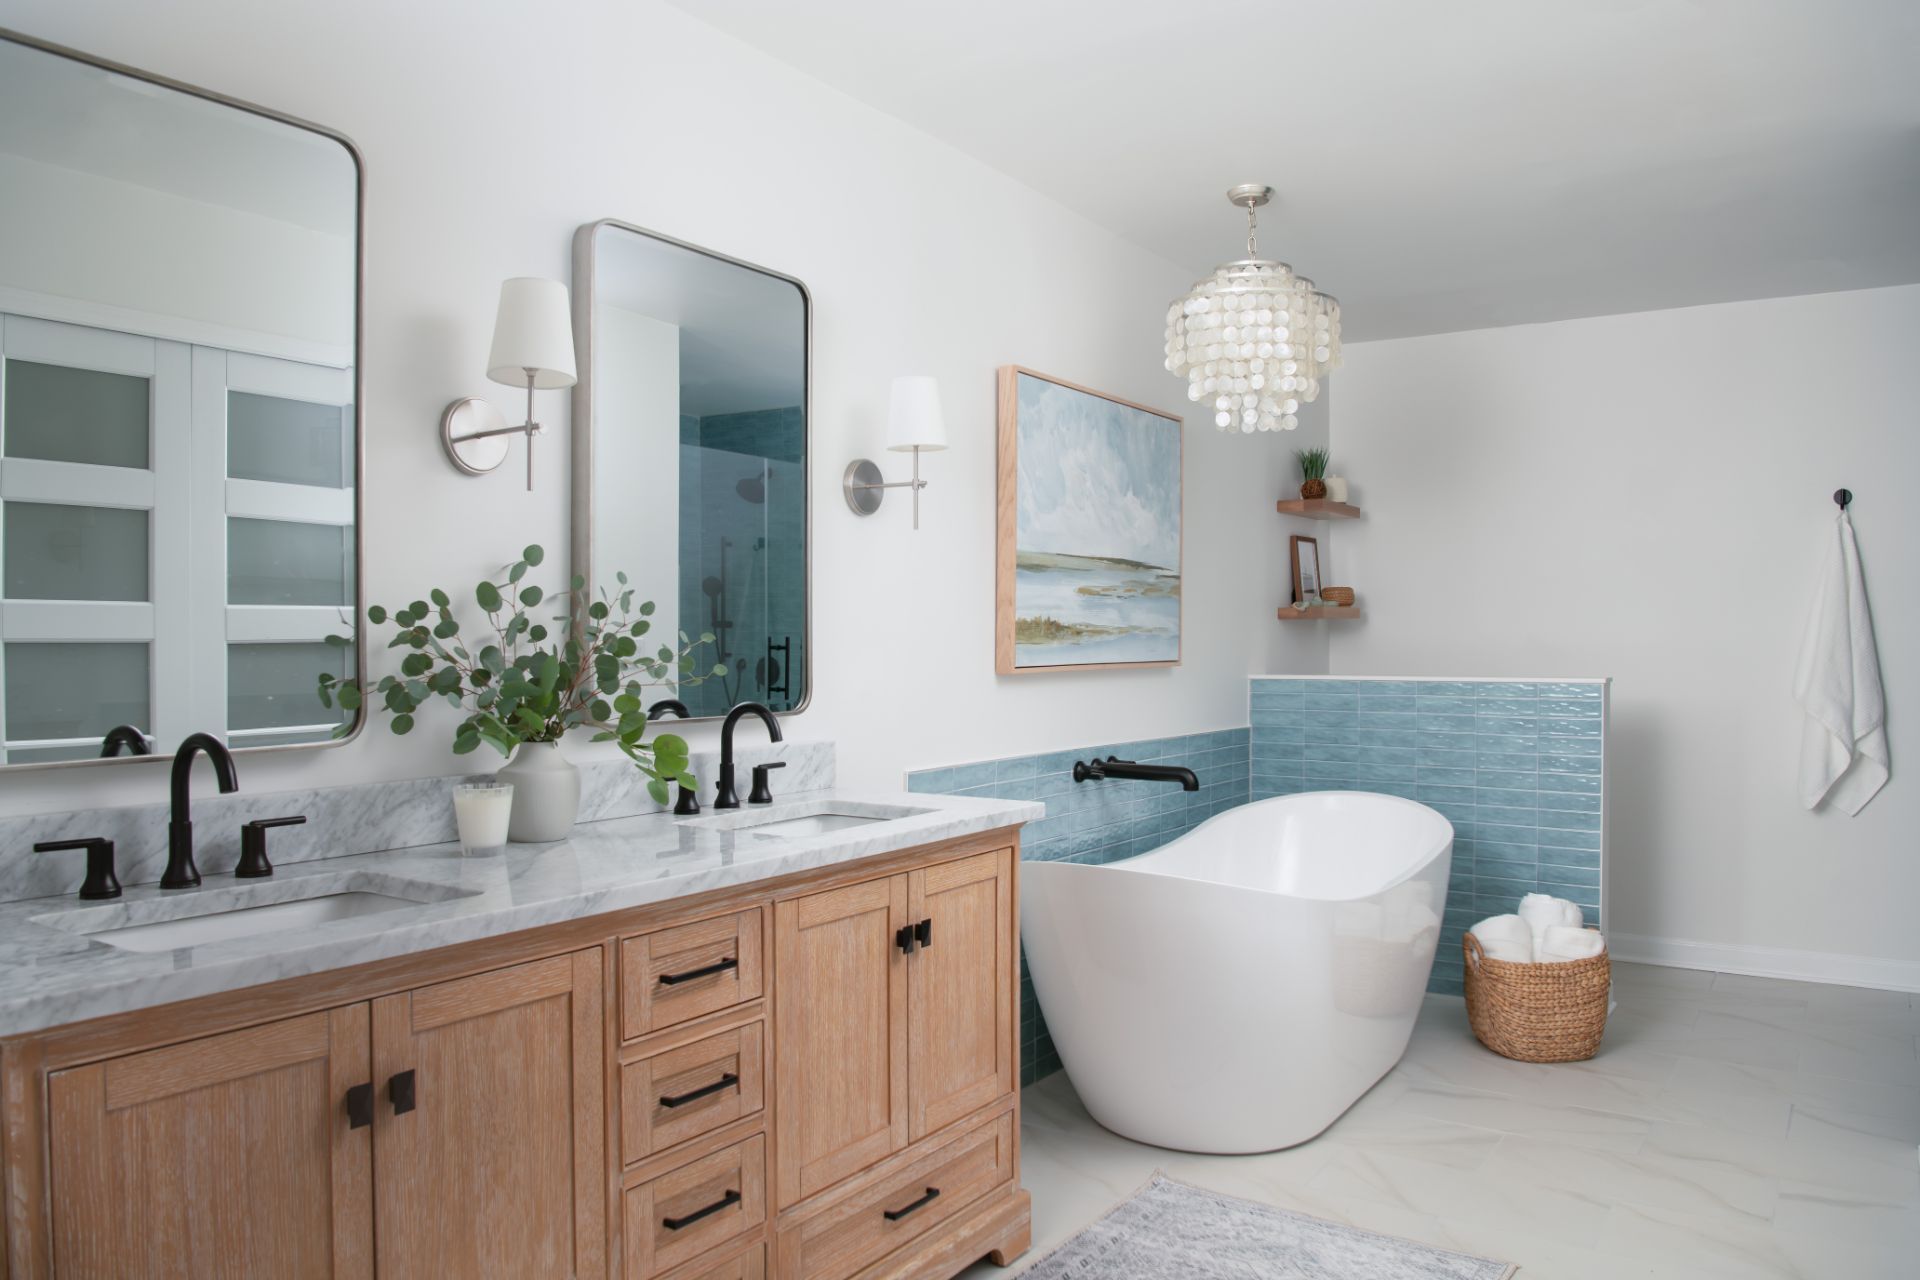
In Part 1 of Project Room for Everyone, we shared how we transformed an unfinished space into a cozy bonus room made for entertaining, work, and family time. We also shared a bathroom reveal and each intentional detail we added to this design. From the beginning, this project was all about creating spaces that support our clients’ lifestyles, and now we’re continuing the journey downstairs.
For Part 2, we’re diving deep into the family room. It started as a space our clients used every day, but it no longer reflected how they wanted their home to feel.
As a busy family with older kids involved in sports, school, and activities, they wanted a room that felt warm, cozy, and elevated, but also one they could use to entertain guests, relax together, and feel excited to host people.
In this blog post, we share how we tackled each part of the family room and built a cohesive space that our clients were looking for.
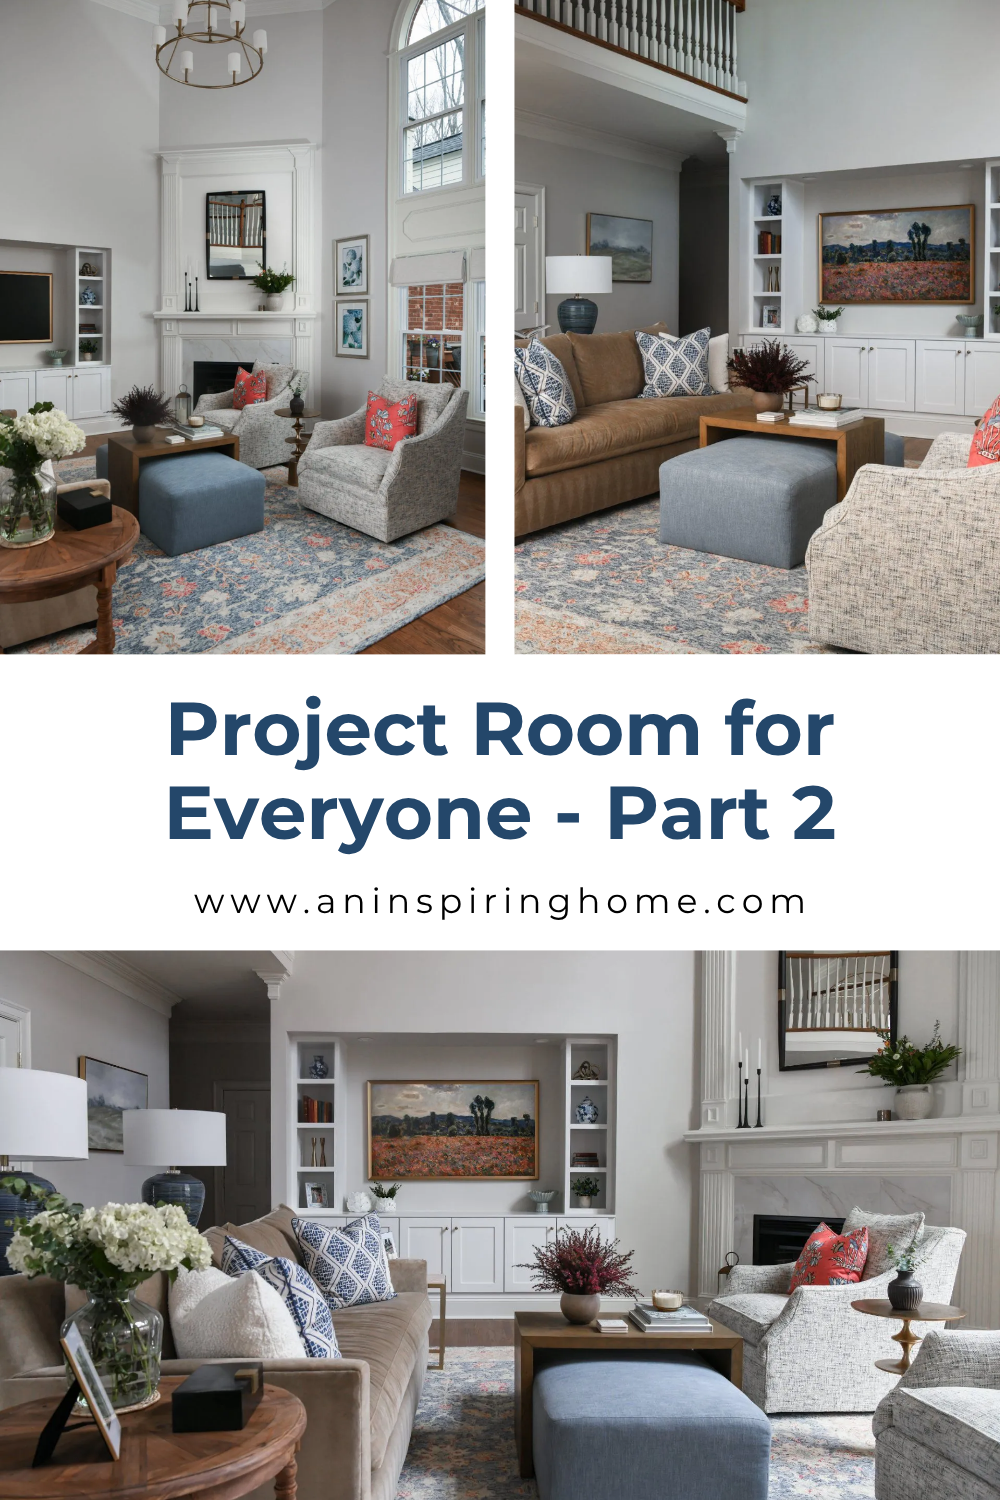
Project Room for Everyone Reveal - Part 2
Before the renovation, this room felt dark, outdated, and disconnected from the rest of the home. We had just completed a bonus room and a half bathroom that felt elevated and luxurious, and now, it was all about connecting the dots in one of the home’s most important rooms: the family room.
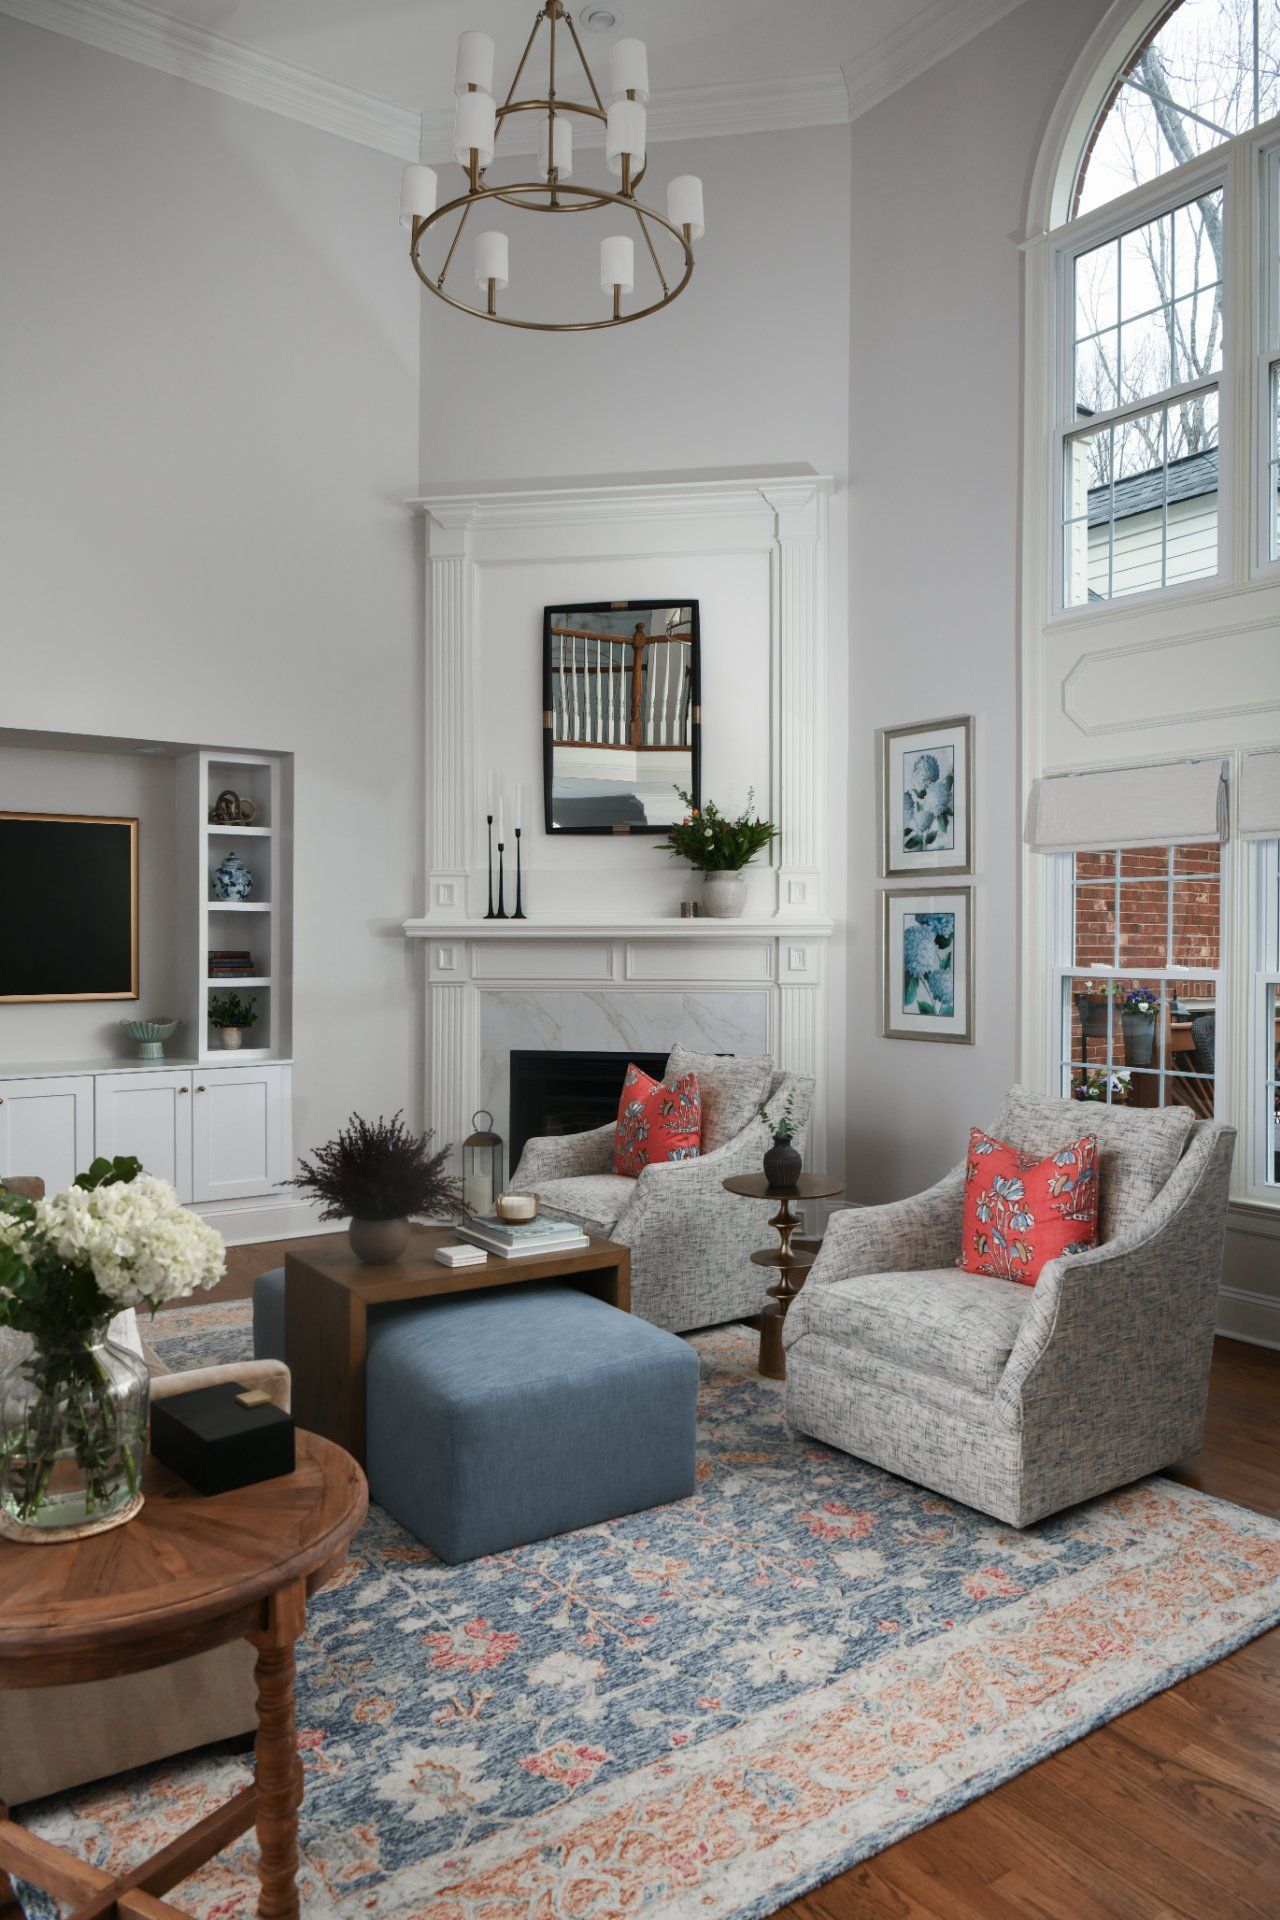
One of the first things our clients told us during our kickoff meeting was that their sectional felt too large for the space. Even though it was still in great condition, it didn’t work the way they wanted. So we moved this piece into the newly renovated bonus room instead.
With that space open, we started planning and exploring how to turn this room into a space for entertaining, so we completely redesigned the family room with all-new furnishings, which immediately transformed the room.
Along with new furnishings, our design plan included:
- Providing a more open furniture layout to create an inviting environment.
- Comfortable swivel chairs for conversation
- Different lighting layers to create a cozy space
- Adding textures through custom pieces
- One final touch, which included a
wool rug
that tied the entire room together
The result is now a family room that feels polished and inviting while still being incredibly livable.
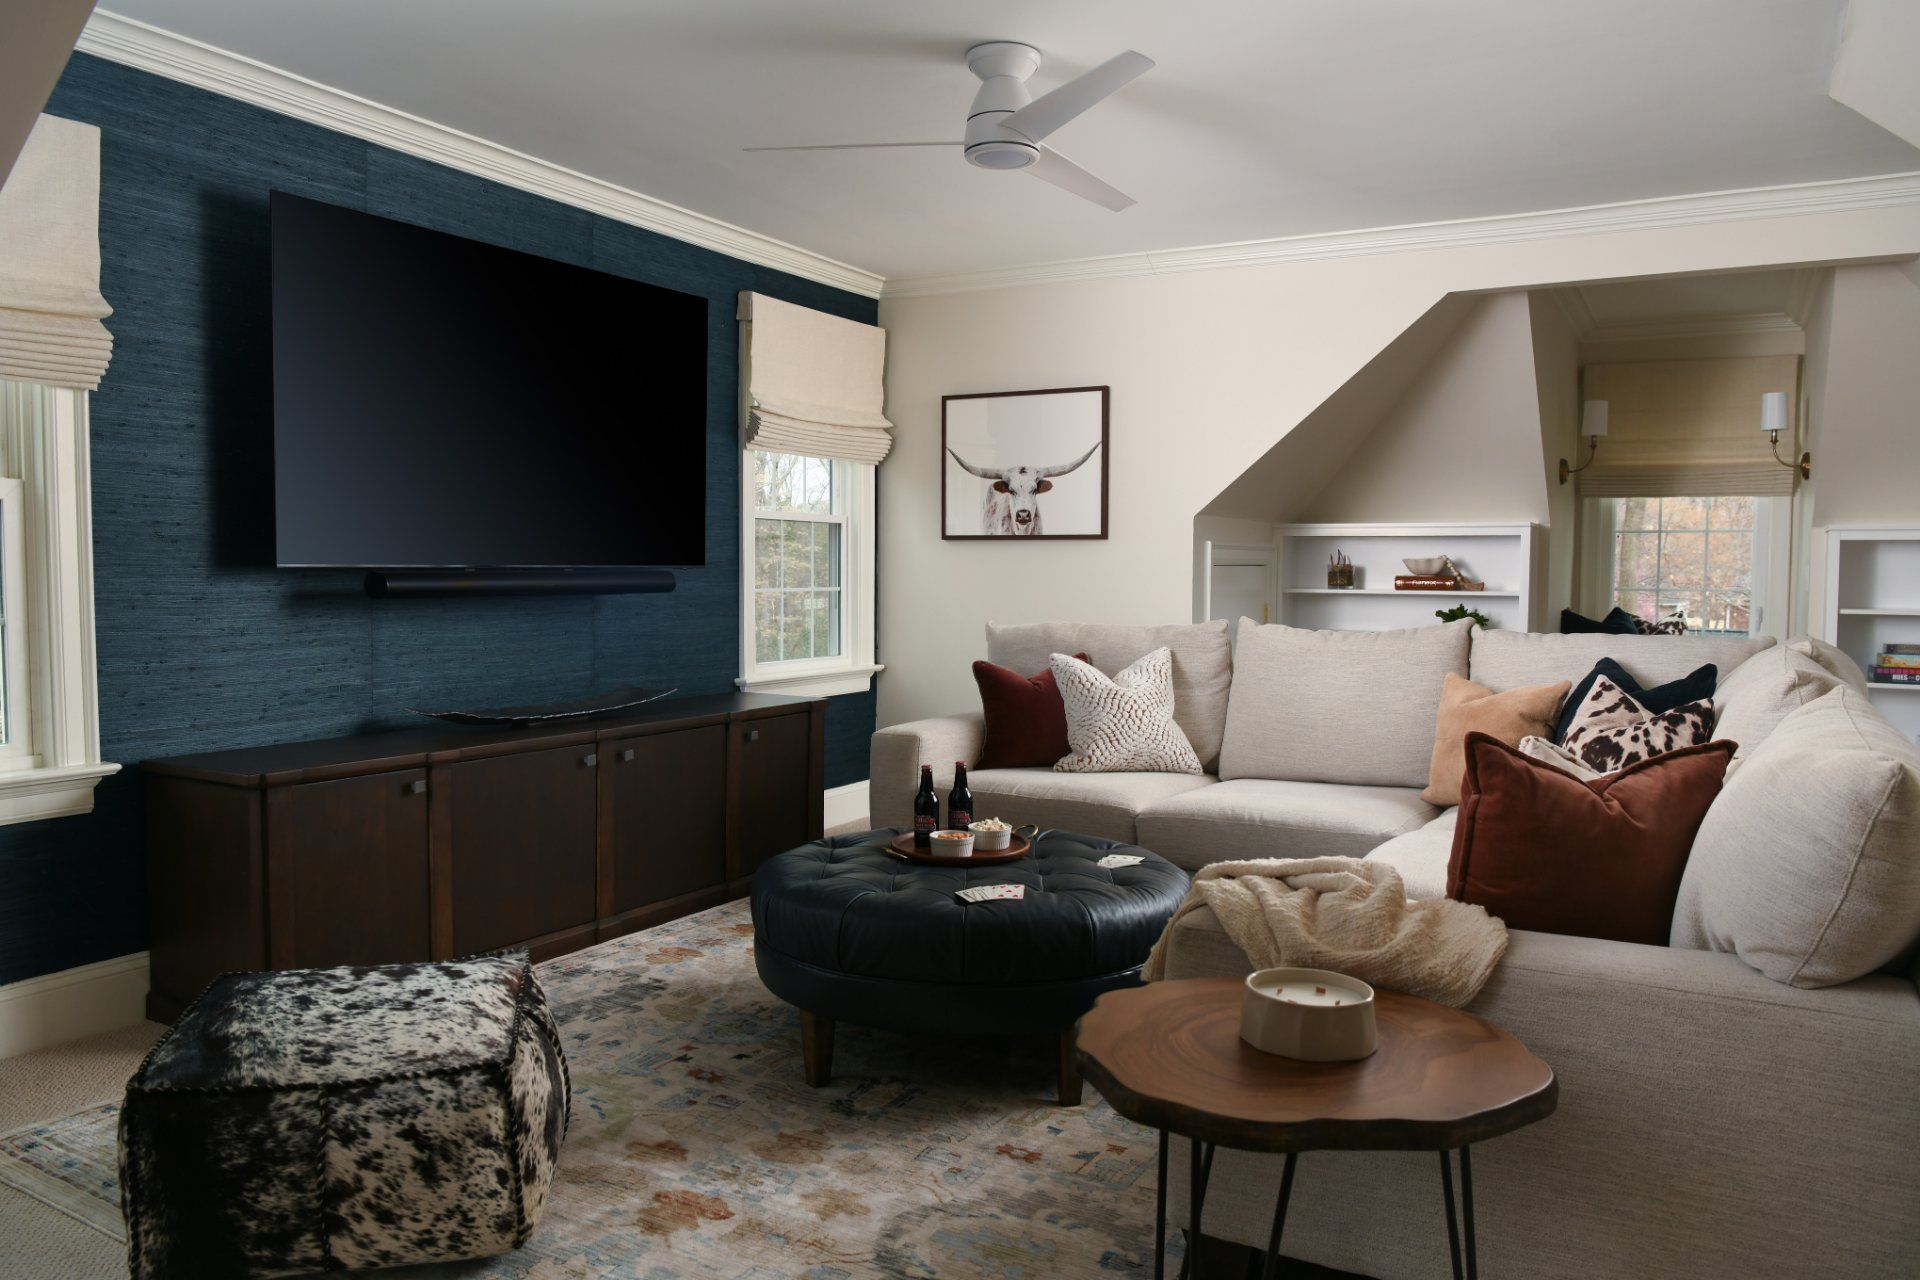
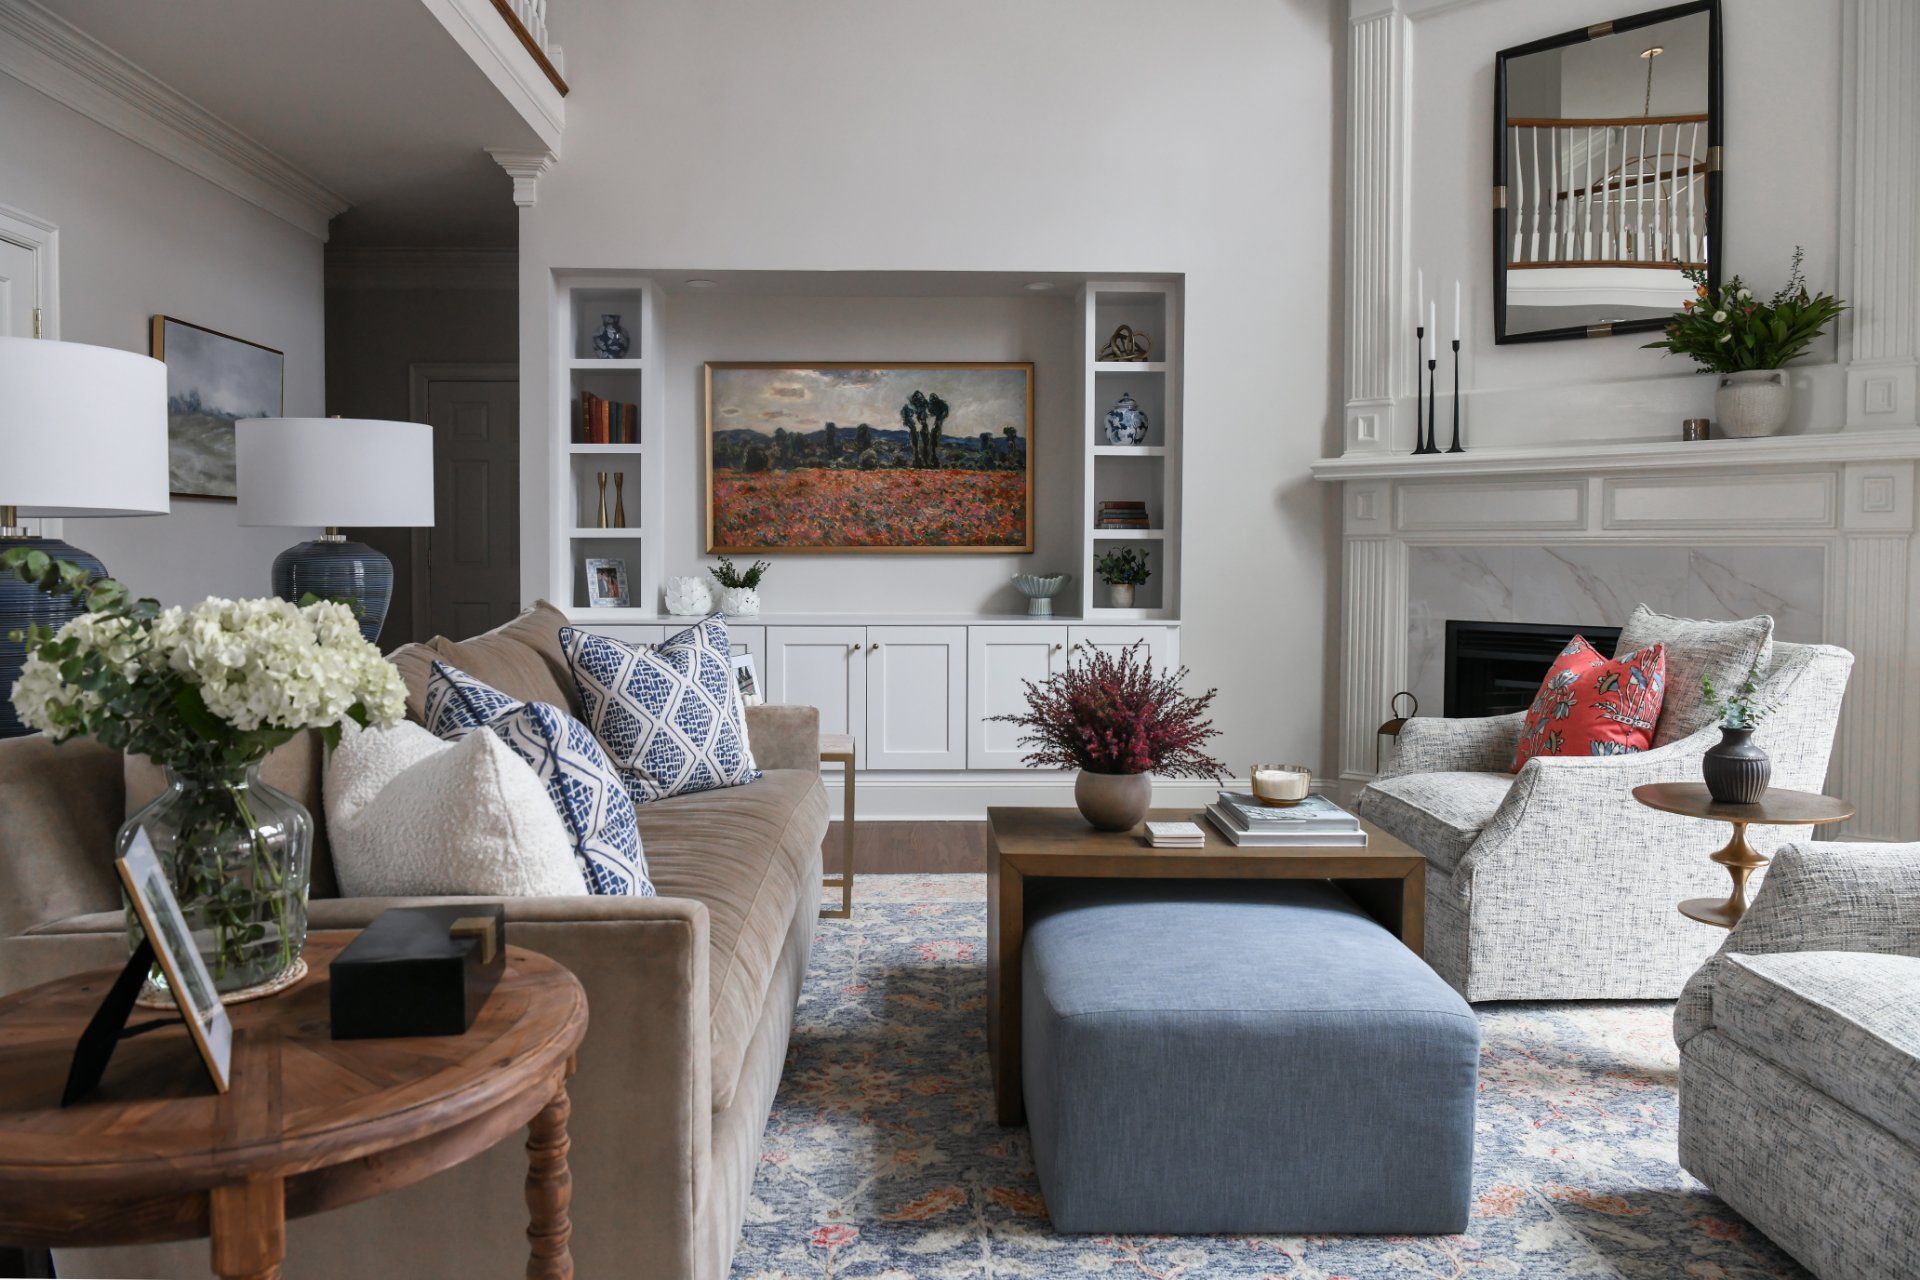
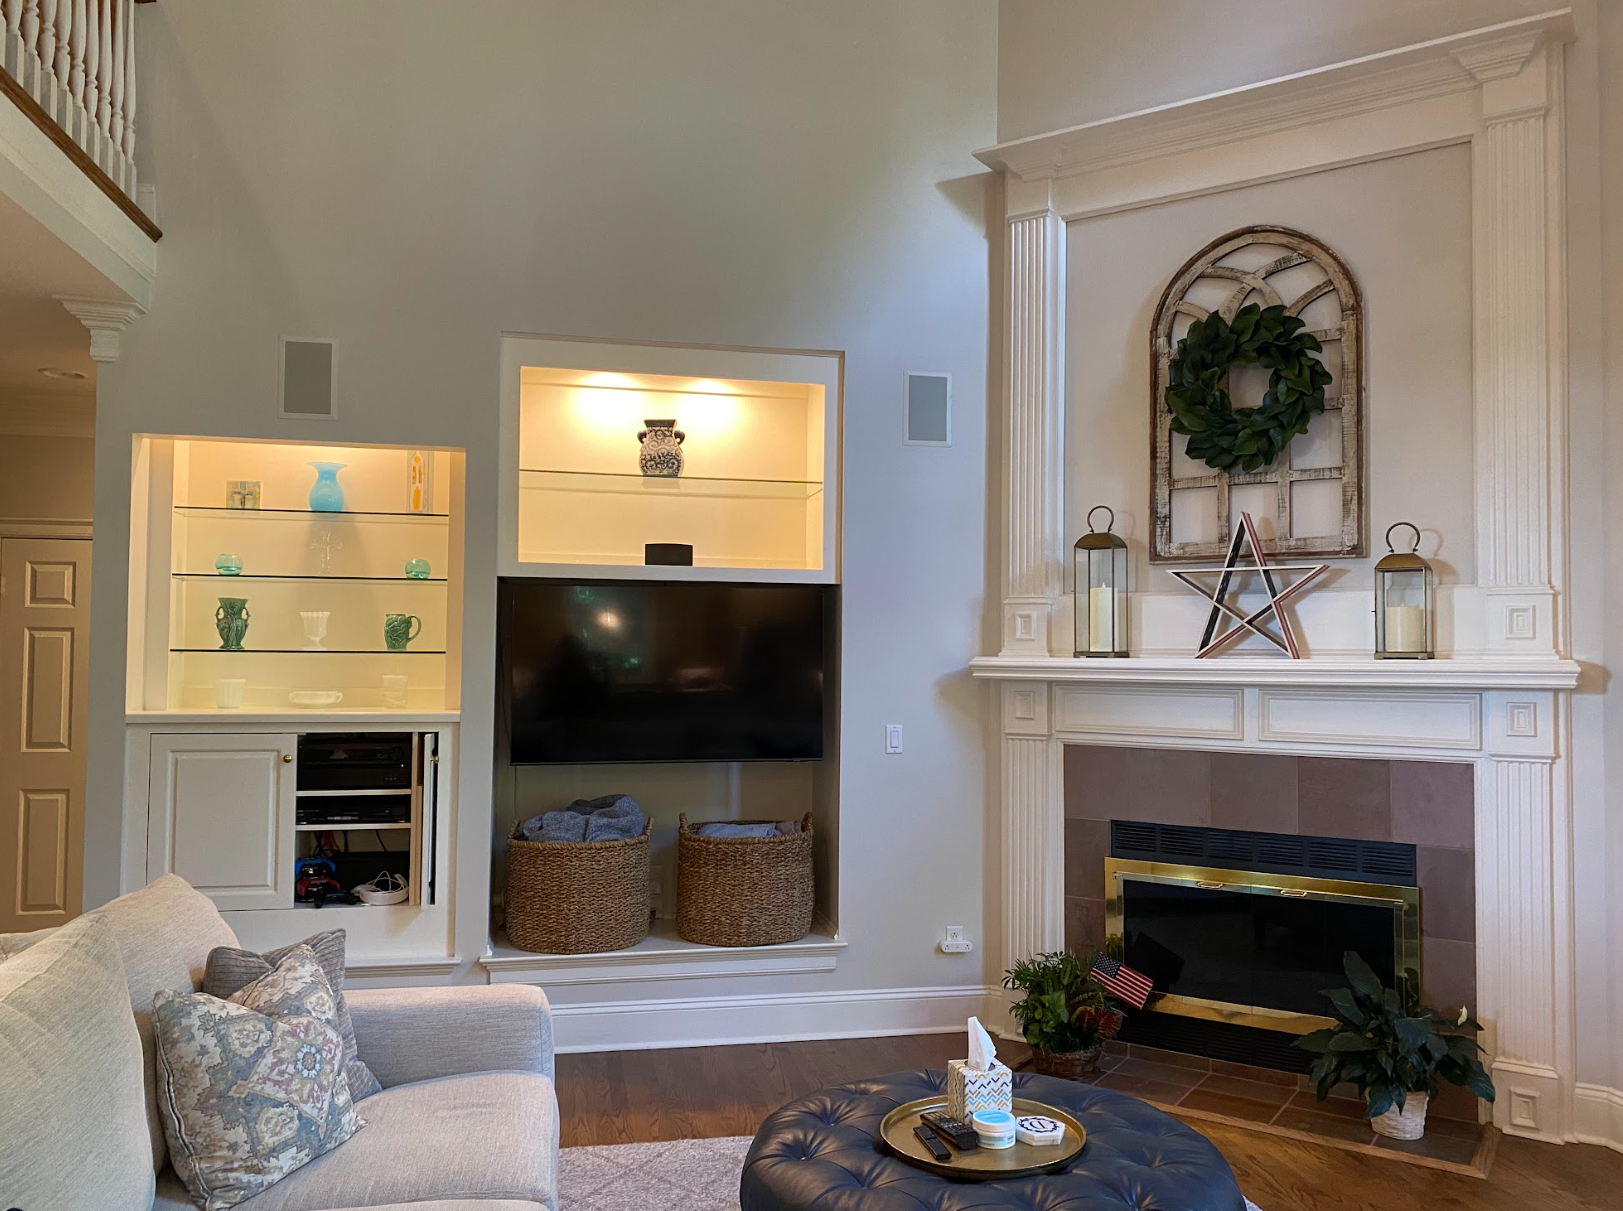
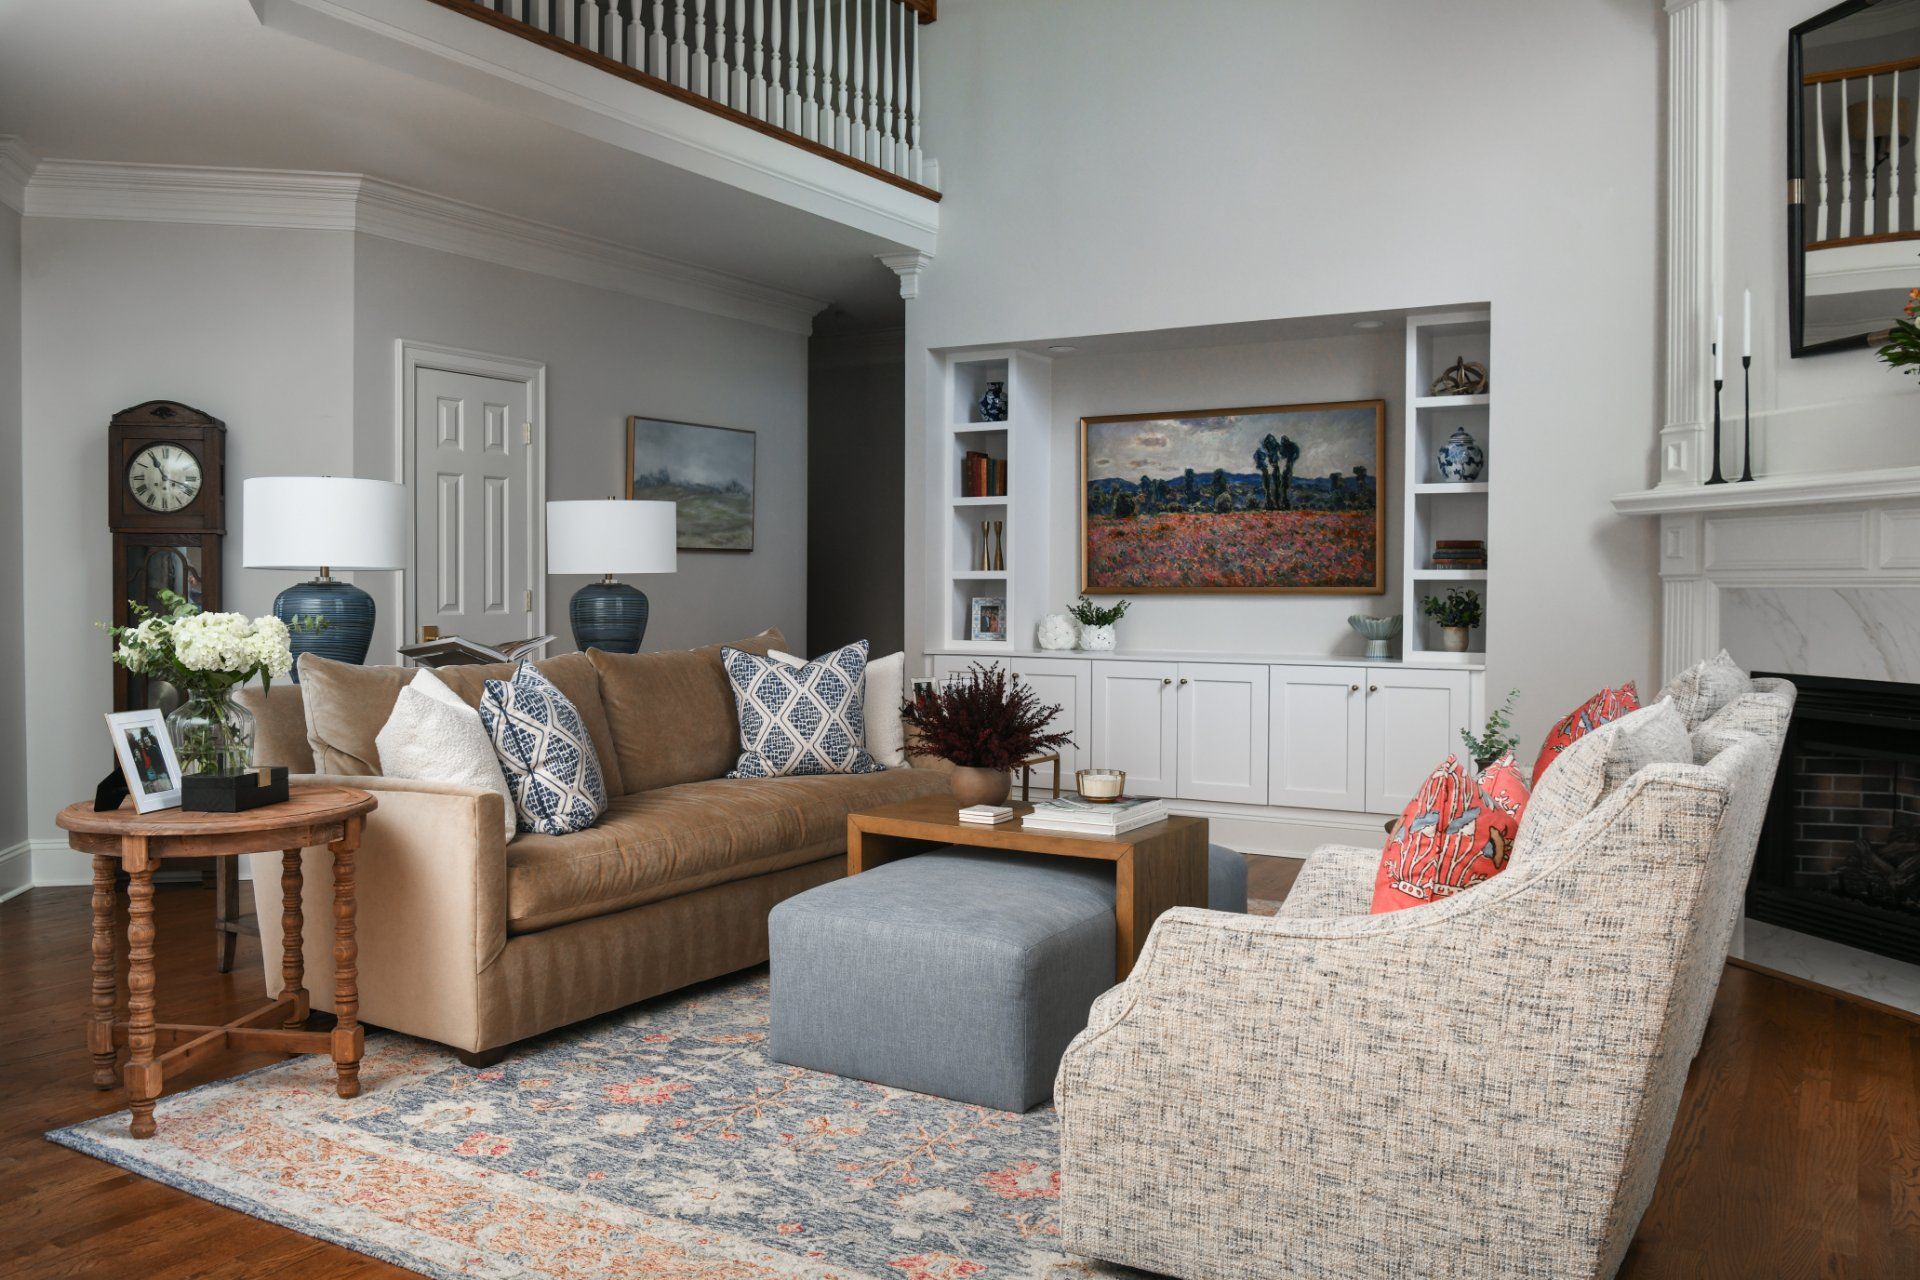
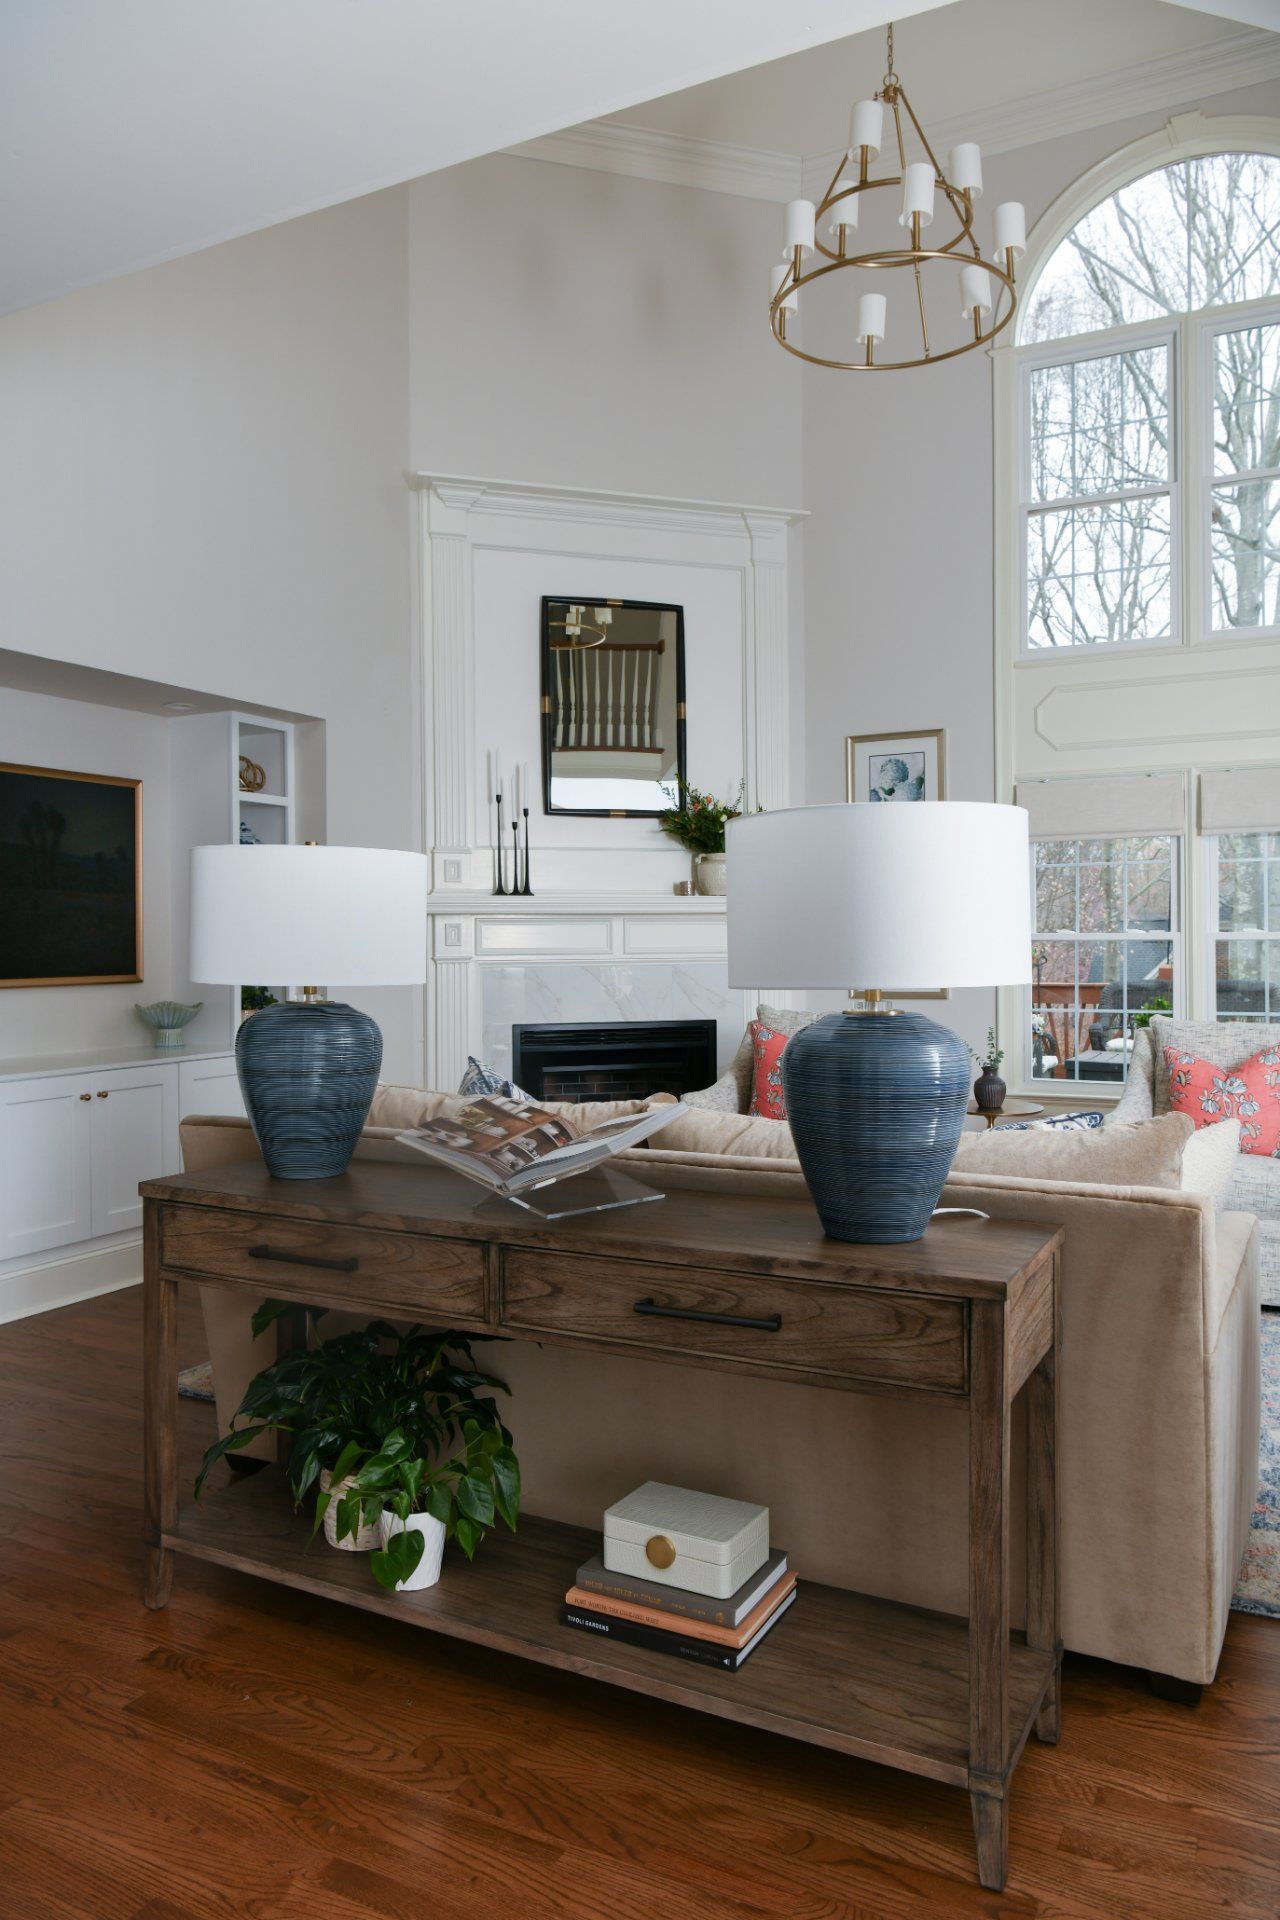
Giving a New Life to the Fireplace and Built-Ins
Another pain point in the original room was the TV & fireplace wall.
The original fireplace didn’t meet our clients’ needs, and the built-ins next to it felt old-fashioned, heavy, and choppy. For the fireplace, we installed a new firebox and sourced new tile and a tile surround. This new look makes it look better, and the change speaks for itself.
Notice how we painted the wall section above the fireplace, and it provides a whole new look.
On the other side, the glass shelves and layered cabinetry made the wall feel outdated.
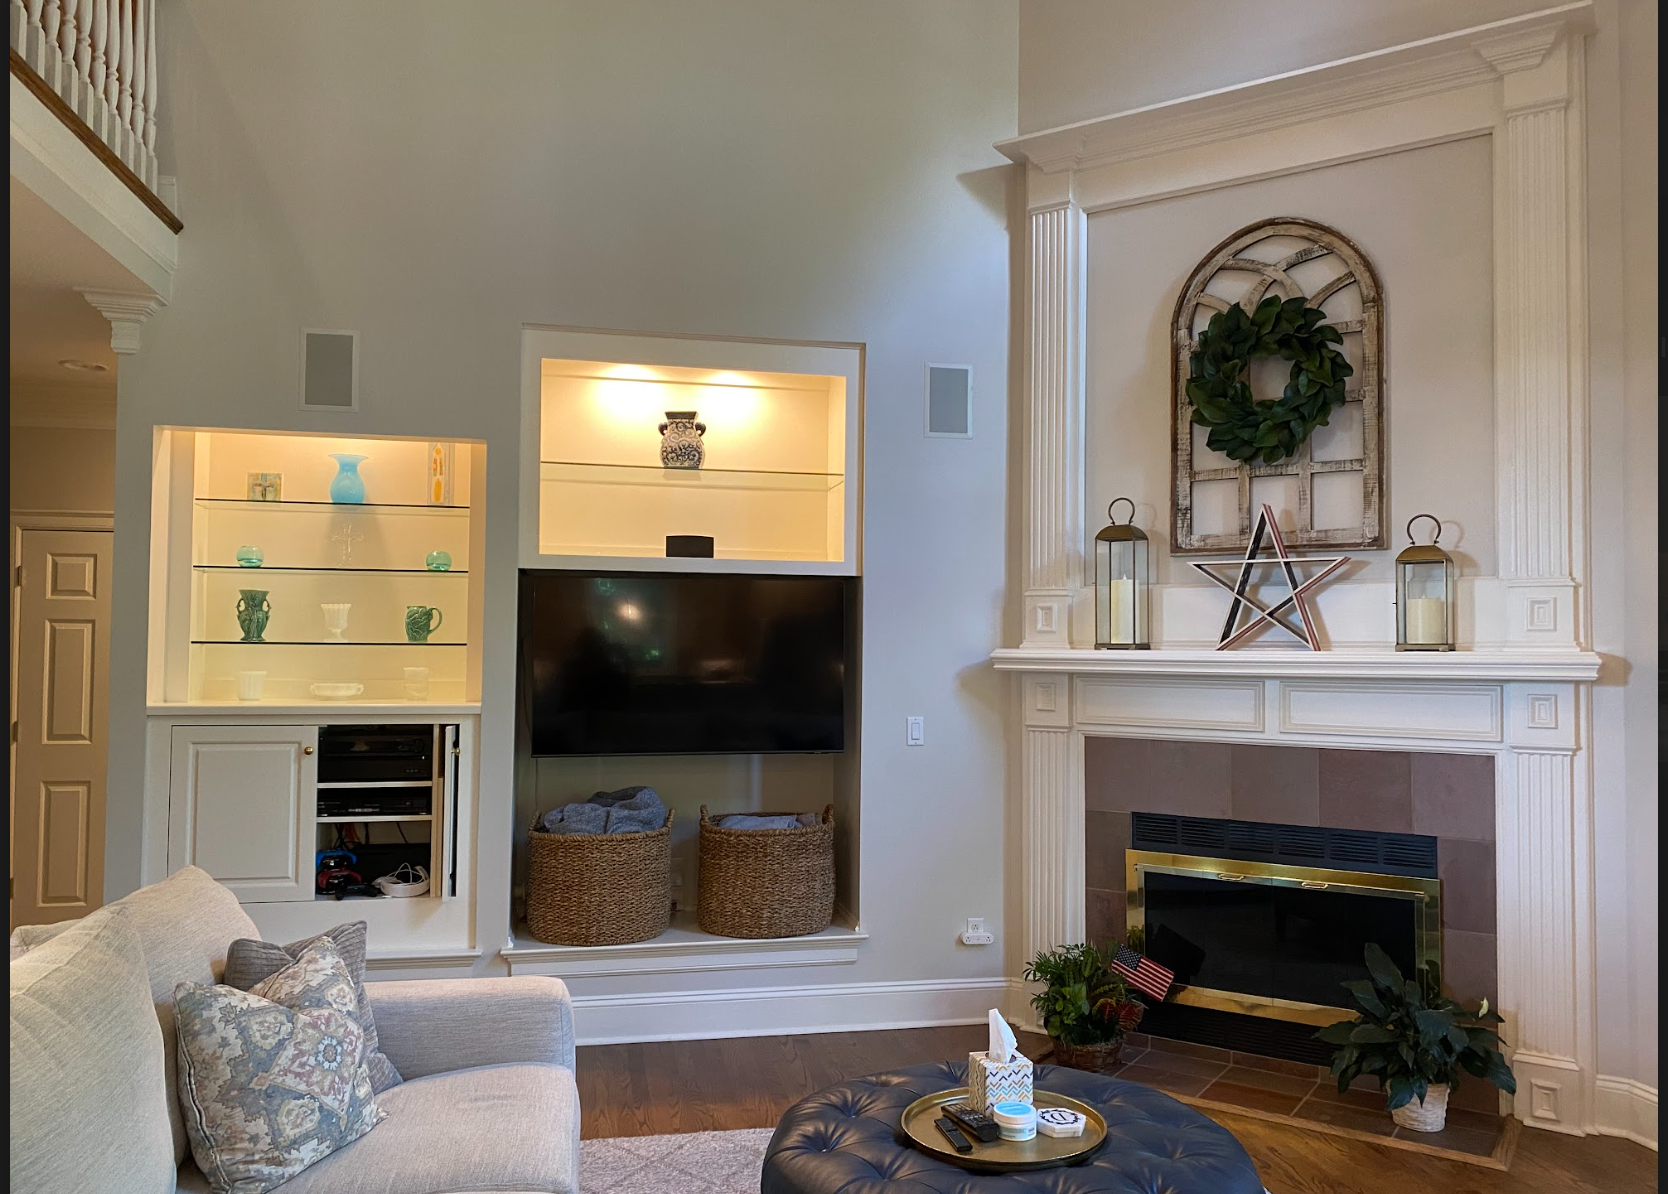
Since contractors were already working on the bonus room upstairs during this room’s makeover, we suggested taking the opportunity to redesign this built-in wall completely, and our clients were immediately on board, because the current option wasn't working well.
Our approach was to simplify this area and introduce a cleaner, more streamlined look while styling it with substantial decor and accessories.

Sometimes our clients ask us how to style shelves and what to put on them. While it may seem like a simple task, we recommend approaching it with intention, directing each element toward a balanced look. We like to mix and match textures, shapes, and use a variety of items, including some things our clients already had.
This whole wall now feels timeless, functional, and aesthetically pleasing to view.
Personalizing the Space with Thoughtful Details
A goal we always aim for in our projects is to create a home that feels personal to our clients, rather than a copy something found online.
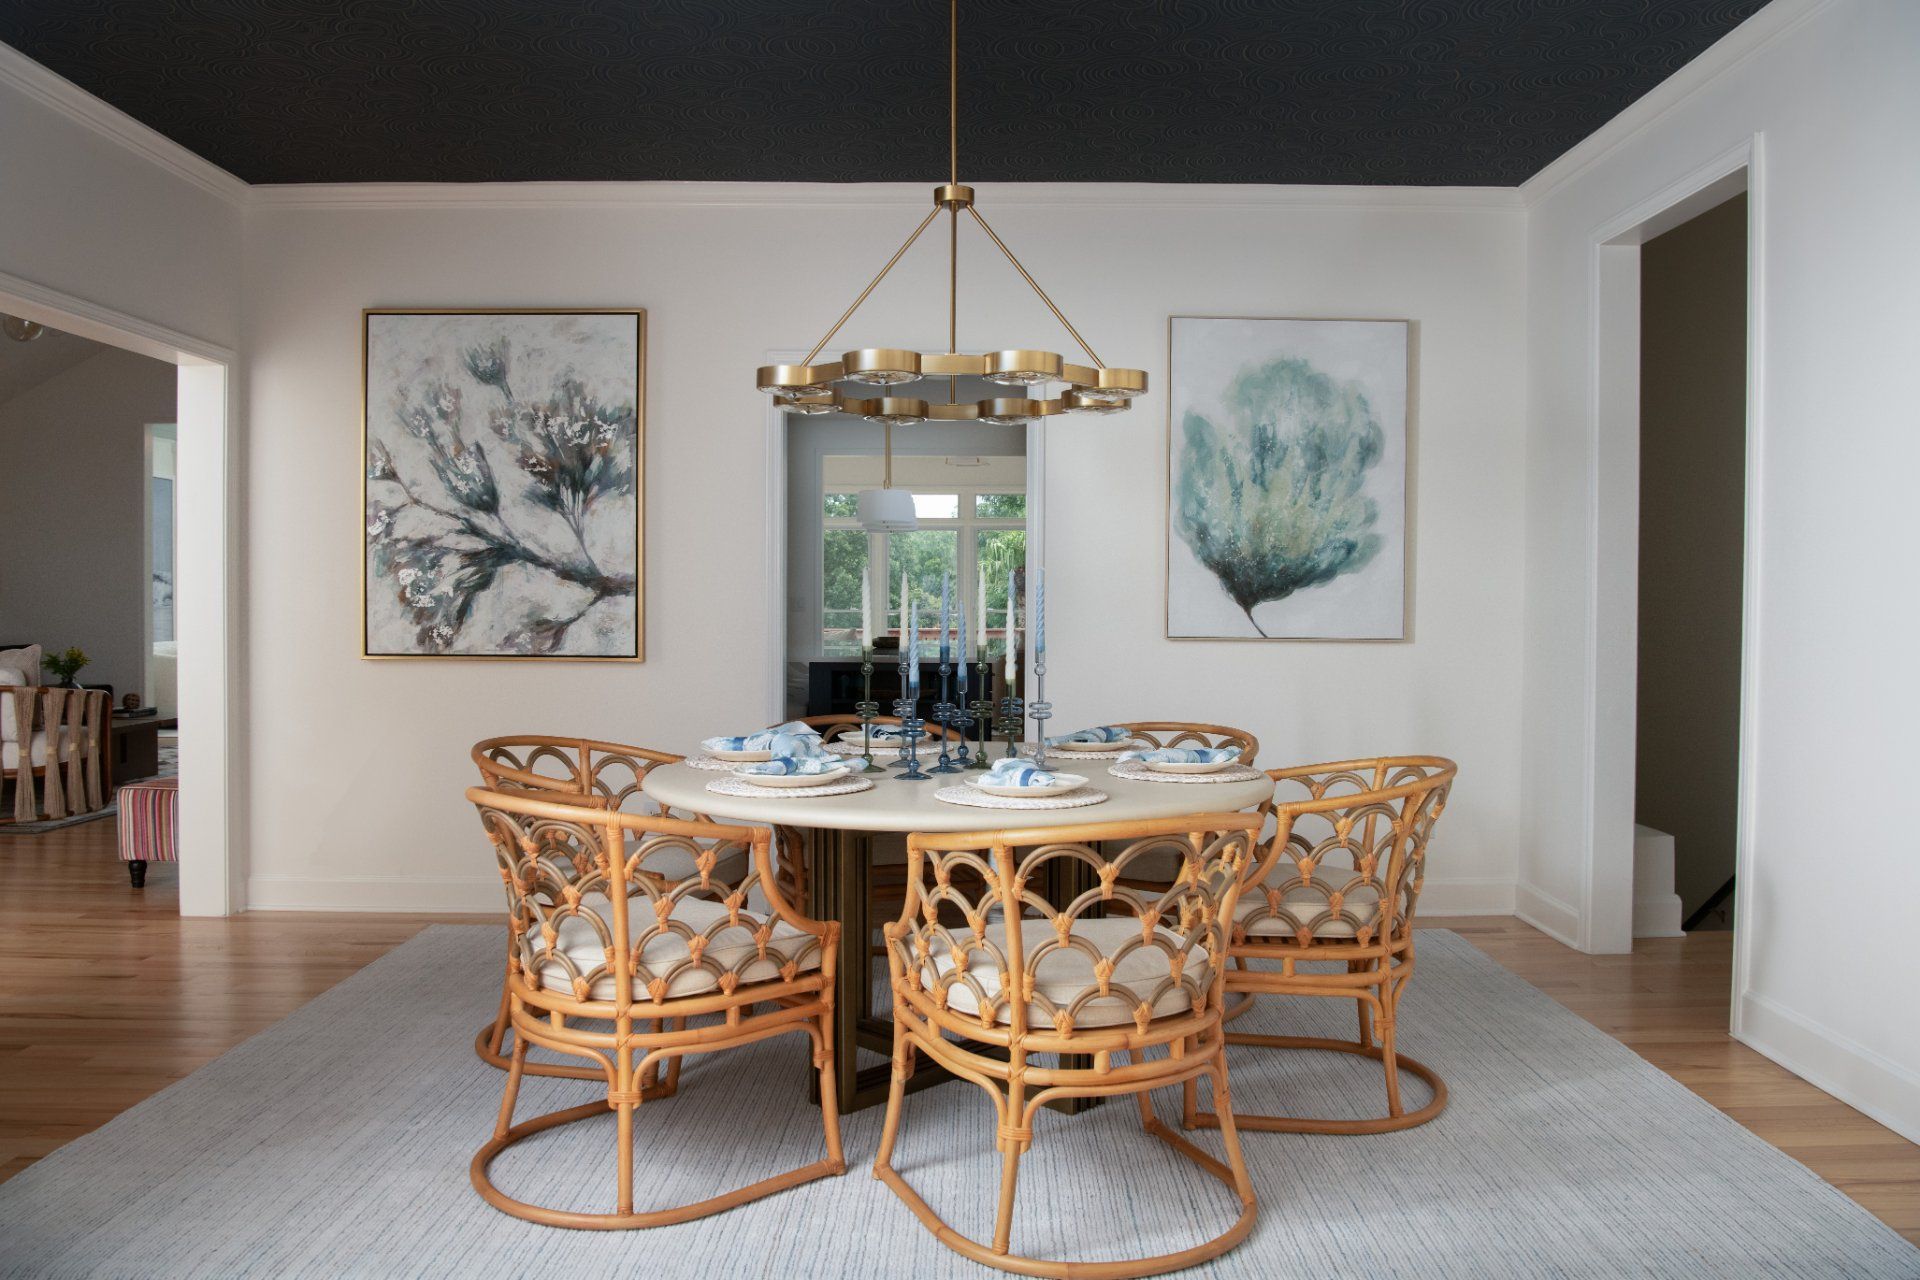
Our clients are originally from Texas, and we wanted to incorporate this part of their story into their family room, just as we did in the bonus room with the longhorn picture and leather ottoman.
Here are a couple of thoughtful details we included:
- Artwork inspired by Texas bluebonnets
- Layered red and blue tones, reminiscent of the Texan flag.
- Warm wood finishes for rustic, country charm.
- Cozy textures to balance the whole design, such as leather and wool
These details make this room feel unique while keeping the design elevated and timeless.
Designing for the Way They Live
Functionality was a priority in this room’s renovation. We wanted this room to allow our clients to connect more naturally to the kitchen, creating better flow for entertaining and everyday life.
We included swivel chairs to face the TV, the kitchen, or each other for conversation.
We also layered details that make a difference in how our clients live their everyday lives, such as:
- Movable ottoman tray for flexibility and functionality.
- Additional storage behind the sofa.
- Custom Roman shades to help control light
- Dimmable lighting to create a cozy space in the evenings
Every decision was intentional and designed around how this family actually uses their home.

Lighting Makes All the Difference
We designed every part of this room with intention, but as we like to say, lighting can make or break a space.
The original ceiling fan wasn’t providing enough light or visual impact, so we replaced it with a new chandelier on a dimmer, something we recommend for living and dining spaces.
In this area, we also added large table lamps behind the sofa. We also included softer ambient lighting for entertaining and relaxing.
In the end, lighting isn’t just functional; it completely changes how a room feels.
Next Step: Styling and Art Placement
One common question about clients is how to hang their art pieces and decorate around them.
Our clients had different meaningful family artwork pieces throughout the home, including paintings passed down from relatives. Some were in outdated frames or simply weren’t displayed in the best location.
In this design, we helped reframe the existing artwork to modernize it and assist with the proper placement of each piece throughout the home.
Another detail we supported during this design process was the installation of each piece to ensure that our vision was cohesive and brought to life.
If you’re wondering how to hang your art pieces, here’s a simple rule we share with our clients: The center of the artwork should generally hang around 60 inches from the floor for the most balanced look.
Small details like this can make your room feel significantly more intentional and professionally designed.
Next Steps for This Project
One of the biggest lessons from this project has been the value of planning ahead.
For Part 1, our clients brought us in after construction had already started, which meant we had to make decisions quickly. Now, as we move into the next phase of the renovation, the kitchen and additional living spaces, we’re able to begin the design process before demolition starts.
Planning before construction begins allows us to select finishes, coordinate with contractors, order materials in advance, and create a smoother experience for our clients.
We can’t wait to show you the kitchen reveal, so subscribe to our newsletters to be the first to know about this reveal.
In the end, this project reflects what thoughtful design should accomplish: a home that feels welcoming, personal, functional, and ready for life.
Whether it’s movie nights upstairs, gathering in the family room, or hosting friends and family,
we designed every space with intention and with room for everyone.
What’s your design style?
Find out what kind of interior design best suits your inner self. From Transitional to Modern, it's time to make your home a place you’ll love!
You can opt-out at any time. Please note we do not share your information with anyone.

I work with busy families to create beautiful and functional spaces by providing local design services in the Charlotte/Waxhaw area and beyond through online design.

What’s your design style?
Find out what kind of interior design best suits your inner self. From Transitional to Modern, it's time to make your home a place you’ll love!
You can opt-out at any time. Please note we do not share your information with anyone.

Recent Posts